

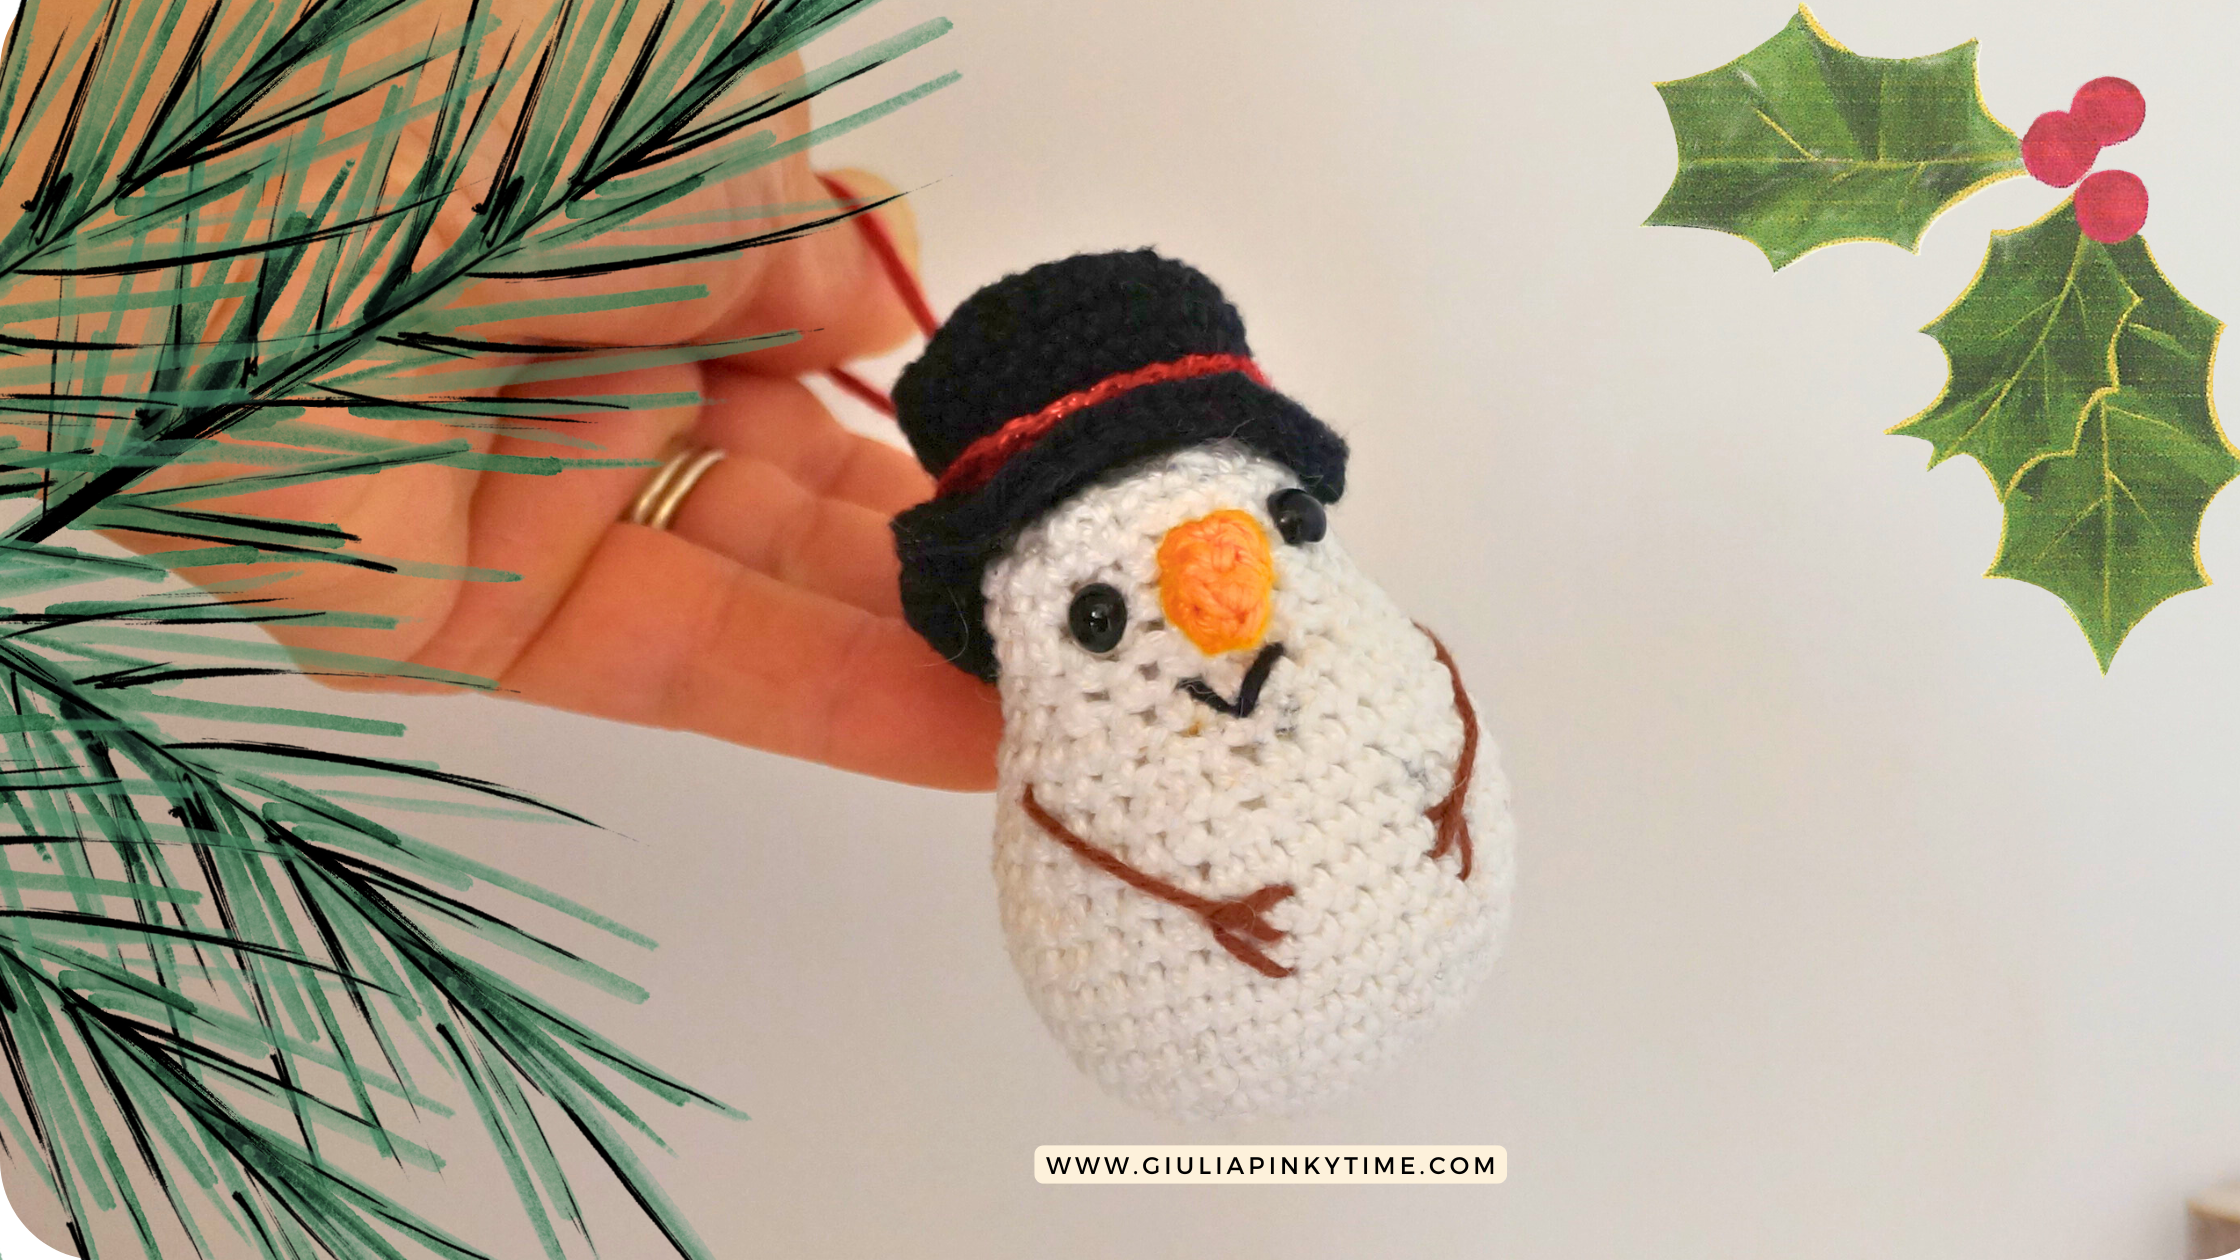
How to Crochet a Snowman Amigurumi: Free Step-by-Step Guide with Video Tutorial
Follow this amigurumi snowman tutorial, easy crochet pattern, perfect for a Christmas crochet idea or as a handmade gift!
Looking to add a handmade touch to your holiday decor?
This easy-to-follow crochet snowman tutorial is perfect for beginners and seasoned crafters alike.
Using cotton yarn in white, black, orange, and brown, you can create a charming snowman that makes a wonderful Christmas ornament or a thoughtful gift.
Plus, I’ve included a video tutorial to guide you through every step!
Indice contenuto
Materials Needed for Your Snowman Amigurumi
Before we get started, gather the following supplies:
- Yarn: 100% Cotton yarn White (body), Black (hat), Orange (nose), Brown (arms and details)
- Crochet Hook: Size 2.5 mm or appropriate for your yarn
- Stuffing: Polyester fiberfill
- Safety Eyes: 6 mm
- Needle: For sewing details
- Scissors

Depending on the yarn you choose, you will have to adapt the size of the crochet hook.
Working time: about 1 hour | skill level: easy
Abbreviations & meanings (US terms)
- MR = Magic ring
- CH = chain
- SC = single crochet
- SLST = slip stitch
- HDC = half double crochet
- INC = Increase, 2 SC in the same stitch
- DEC = Decrease, 2 SC together
- REP * = repeat from * to * until the end of the row
In the Amigurumi Snowman tutorial, I will show you how to work in the spiral round without closing each round with a slip stitch but continuing to work in a continuous round.
A stitch marker will come in handy to mark the first or last stitch, and you will have to move it for each new round.
Step 1: Crochet the Snowman’s Body
Begin by crocheting the snowman’s body using white yarn. The body is worked in continuous rounds to achieve the seamless amigurumi style. Follow the basic amigurumi pattern:
- Round 1: MR, 6 SC (6)
- Round 2: 6 INC (12)
- Round 3: * 1 SC, INC *; REP * 6 times (18)
- Round 4: 1 SC, INC; * 2 SC, INC*; REP * 5 times, 1 SC (24)
- Round 5: * 3 SC, INC *; REP * 6 times (30)
- Round 6: 2 SC, INC; *4 SC, INC *; REP * 5 times, 2 SC (36)
- Round 7-11: 1 SC in each stitches around (36×5)
- Round 12: 2 SC, DEC; * 4 SC, DEC*; REP * 5 times, 2 SC (30)
- Round 13: 1 SC in each stitches around (30)
- Round 14: * 3 SC, DEC *; REP * 6 times (24)
- Round 15: 1 SC in each stitches around (24)
- Round 16: 1 SC, DEC; *2 SC, DEC*; REP * 5 times, 1 SC (18)
- Round 17-20: 1 SC in each stitches around
Start stuffing and insert the security eyes between the 18th and 19th round (18×4) - Round 21: * 1 SC, DEC *; REP * 6 times.
Insert some more padding and embroider the arms and mouth (12) - Round 22: 6 DEC (6)
Fasten off, cut the yarn, and hide it.
Step 2: Make the Hat
Use black yarn and work in rounds to form a cylinder. Add a brim using half double crochets for a neat finish.
- Round 1: MR, 6 SC (6)
- Round 2: 6 INC (12)
- Round 3: * 1 SC, INC *; REP * 6 times (18)
- Round 4: 1 SC, INC; * 2 SC, INC*; REP * 5 times, 1 SC (24)
- Round 5: 1 SC in each stitches around back loop only (24)
- Round 6-9: 1 SC in each stitches around (24×4)
- Round 10: 1 back post SC in each stitches around (24)
- Round 11: 2 CHs, 1 HDC next to the beginning CH, 2 HDC in each stitches around (48)
Fasten off and leave a long tail; use it to view the cylinder on the head of the snowman. With the same yarn, embroider the mouth (WATCH THE VIDEO)
Step 3: Make the Nose
For the carrot nose, use crochet a small cone using orange yarn. This adds a playful touch to your snowman.
- Round 1: MR, 4 SC (4)
- Rounds 2-4: 1 SC in each stitches around (4×3)
Fasten off, leave a long tail, and use it to sew the nose on the head of the snowman between the eyes.
Step 4: Add Arms and Details
Using brown yarn, create thin chains for the arms and embroider small details like the smile. Sew these onto the snowman for a polished look.
Video tutorial: Follow Along for Extra guidance
To make your crafting experience seamless, watch our step-by-step crochet snowman video tutorial below. The video breaks down each stage of the process and is perfect if you’re a visual learner.
Why You’ll Love This Crochet Snowman
This project is not just fun to make; it’s also highly customizable! Experiment with different yarn colors or add accessories like a scarf or buttons.
Whether you’re decorating your home or crafting gifts for loved ones, this snowman amigurumi is sure to spread holiday cheer.
Conclusion: Bring your Snowman to Life!
Now it’s your turn to create this adorable snowman amigurumi. Whether you’re making it for yourself or gifting it to a loved one, this project guaranteed to bring smiles.
I’d love to hear how your snowman turned out-leave a comment below and share your creativity!
This snowman is more than just a decoration; it’s a heartfelt creation that brings warmth to the season. Subscribe to my newsletter for more free patterns and tutorials, and don’t forget to tag me (@giuliapinkytime) on social media with your finished snowman!
If you find error in my English instructions, please write me here, I’ll be grateful for your help and collaboration!


Happy Pinky Time, stay curious, and see you in the next tutorial
This pattern is an original pattern by Giulia Mollica of giuliapinkytime. Please do not claim this pattern as your own. If you wish to share this pattern, you may link to this pattern, but please do not reprint it on your site. You may keep a copy for your own personal use, but please DO NOT sell the pattern or distribute it.
You may sell products made from this pattern, but please clearly credit the design to me, Giulia Mollica of giuliapinkytime. Permission is NOT granted for mass production or factory manufacturing of any kind. Thank you!

